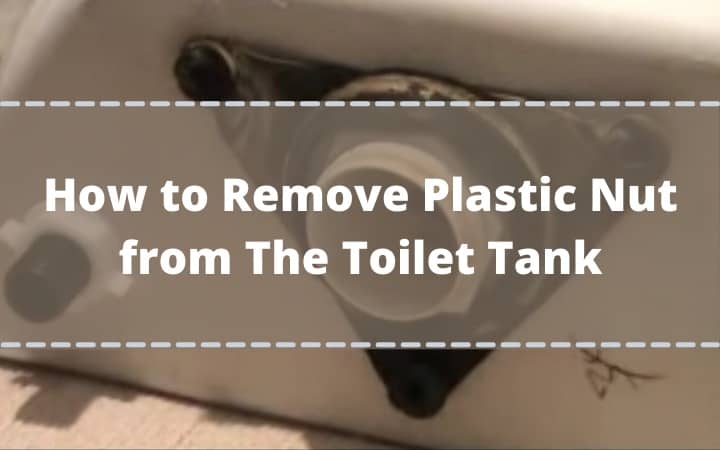
A toilet tank holds the water essential for flushing the toilet after each use. It consists of a flush valve, flapper, fill valve and overflow tube in most conditions. The plastic nut sits right beneath the toilet tank holding up the entire setup against the toilet bowl.
You may have to remove the nut due to many reasons, including a damaged nut replacement. Thus, knowing how to remove plastic nut from toilet tank will be a nice DIY project. Also, it is easy and doesn’t need any professional plumbing skills.
You have to drain the toilet tank first and remove the lid. Then, you can remove the plastic nut from the tank using the pliers set or adjustable wrench set. Also, in the meantime, you can check the different valves and overflowing tubes for a thorough check and maintenance.
If you are interested in the DIY project, don’t forget to read the complete article.
How to Remove Plastic Nut from The Toilet Tank
The plastic nut of the toilet tank is nothing except the lock nut at the bottom of the tank. It locks the tank against the bowl with a secure connection. Also, it absorbs vibration as you flush the toilet and forms a leak-free attachment of the water tube with the tank bottom. However, you may have to remove the plastic nut for several reasons-
- You might need to repair the damaged toilet tank
- You may have to remove or replace the valves or tubes for maintenance and repair
Whatever may be the cause, you have to understand the process thoroughly to avoid any mess.
Things you will need-
- Pliers set or wrench
- A container or bowl
The steps are-
Step 1: Remove the Tank Lid
Firstly, you have to remove the lid of your toilet tank. If you have a plastic tank, the lid will be lightweight and easy to move. But for porcelain or tiles made a lid, you must be careful. It is because the tiles are often heavyweight, and even a slight tap of any metal such as the wrench or pliers set may cause chipping of the porcelain or a dent on it.
Also, it is a heavyweight part. So, remove it with care and place it in a safe location. Ideally, we recommend you to keep it on a cloth above the floor. It will negate any chances of dent or chips on the porcelain or tiles of the toilet tank lid.
Step 2: Empty the Tank
You may flush the toilet to empty the tank after turning off the main water supply. But some people still prefer the conventional way of emptying the toilet tank with the help of a container or bucket. Firstly, turn off the water supply line of the tank. It is essential because the toilet in-let or fill valve is designed to draw water from the supply line continuously.
Once you have placed the bowl underneath the tank and turned off the main water supply, flush the tank until it becomes empty. The bowl will collect any water after removing the plastic nut.
Step 3: Remove the Plastic Nut
You have to kneel on the floor to remove the nut from the toilet tank. Thus, you should use an old rug or piece of cloth on the floor to support your knee. It prevents your pant from getting weight. You may alternatively wear shorts during the process.
Adjust the wrench set against the plastic nut. Then, slowly move it in an anticlockwise direction to unscrew the nuts. Once the nut is properly loosened, you may unscrew it fully with your hands. Once the nut is removed, and the locking tube is released, the remaining water will accumulate in the bowl. So, don’t remove the bowl beforehand.
You can then remove the toilet tank and perform the remaining maintenance work at ease.
Step 4: Rearrange Everything
Once you have removed the old nut and replace it with a new one, you should set up the tank and its lid. You have only gone backward from this entire process. It is as easy as it sounds.
Tips to Prevent the Plastic Nut from Getting Stuck
The main reason for removing the plastic nut is because it often gets stuck. Then, it gets damaged and needs replacement. You can avoid such inconvenience with some easy steps.
- You should mount the plastic nut against the brass flange. Brass has rust resistance and so won’t catch corrosion. Hence, the plastic nut won’t get stuck due to added rusts around it and the flange.
- You may coat the nut using nail polish or liquor. It also keeps the nut in an optimum state to block stuck. Also, you may use oil for the purpose.
- Plumbers recommend using a nut cap to prevent it from damaging. These caps ensure that the nut enjoys a prolonged lifespan.
What If the Plastic Nut Doesn’t Come Out Easily?
At times, the stuck plastic nut may give you a hard time removing it. The wrench may be unable to remove the screw due to rust or even debris around the nut.
So what do you then?
We have crafted unique ideas to loosen the stuck plastic nut in a short time. It will ease out your toilet tank maintenance process.
Firstly, use a wire brush to remove the debris and dust from around the plastic nut. In most cases, grimes builds up around the nut and causes it to get stuck. The wire brush will remove the external buildups to ease out the process.
Next, you may use a chisel or hammer to tap against the wrench once you have adjusted it against the nut. The tapping enables the wrench set to form a strong bond with the nut and makes the removal process comfier.
Conclusion
So, here we rest down our discussion on how to remove the plastic nuts from the toilet tank. The process is easier than many homeowners actually think. Also, it is a money-saving deal. It is because calling a plumber will cost you a hefty amount.
You have to ensure that you have emptied the toilet tank and turned off the main water supply to avoid any watery mess. Also, don’t forget to turn on the supply line. Otherwise, the tank won’t be filled up for the water required to flush the toilet after use.
-
Pingback: Can I Add A Sprayer to My Kitchen Faucet?
-
Pingback: How To Adjust The Dual Flush Toilet Mechanism