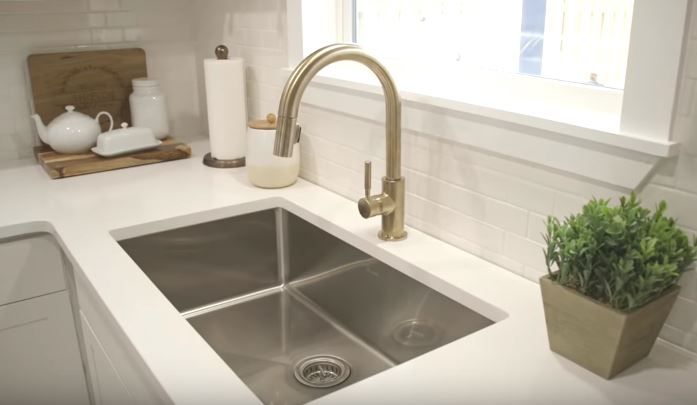
Thanks to the natural cleaning, as well as an array of style and appearances, the under-mount sink has been enjoying growing popularity among homeowners. Hence, naturally, many homeowners seek answers on installing an undermount sink on wood, quartz, and granite.
Some also want to find out how to replace the undermount bathroom sink if it is broken or damaged. Thus, if you are one of those people who is looking for these answers, congrats since you have come to the right place.
We have compiled the step-by-step tutorial on the replacement and installation of the undermount sink in granite, quartz, and wood.
How to Replace Undermount Bathroom Sink
Replacing the undermount bathroom sink is a great DIY project to save money within a short time.
Step 1
As you want to replace the old undermount sink with a new one, it is crucial to measure the new sink so that it will fit into the existing sinkhole. It will reduce the workload as you won’t have to cut the excess portion of the new undermount sink.
Step 2
Now, you will have to create a watertight seal between the countertop and the sink. To do so, carefully add a caulk line on the edges of the sink bowl. This will connect the countertop and the sink bowl tightly. Use a caulk gun to adhere to the caulk on edge.
Make sure that the caulk comes in front of the sink lip, covering the entire perimeter. However, you don’t require to apply a lot of forces to apply the caulk, jut gently press the caulk gun. This should do the job.
Step 3
Now you should reach the underneath of the bathroom sink hole to position the undermount sink. It is recommended to take help from another person. He would hold the sink firmly as you tighten the clips.
You will notice that underneath the sink, it comes with a sink lip- you need to adhere to the hook on the mouth. You need to apply the clips evenly beneath the sink countertop to ensure that the sink is tightened.
Step 4
Now use a screwdriver to tighten all the screws around the countertop and sink hole. Alternatively, you may also use a hand drill and a screwdriver bit.
You may also need to wipe off the excess caulk, in case you find something. You can do it with a clean piece of cloth and water.
Step 5
Now, wait for at least the next 24 hours so that the silicone caulk sets in perfectly. After that, connect the drain lines and faucet.
That’s all you need to do to replace an undermount bathroom sink.
How to Install Undermount Sink to Wood
Installing an undermount sink to the wooden platform is pretty straightforward. So, do you want to see the tutorial?
Step 1
Before you attach the clip with the undermount sink, you need to provide the sink with significant support so that it withstands on the countertop. You can use either fur or pine for support. To do so, you need to measure the length. Once done, you can use a handsaw to cut the pine or fur into a ratio of one by two to add support to the undermount sink.
Step 2
You also need to ensure that the undermount sink adheres perfectly with the countertop of the sink. You will have to apply silicone caulk or sealant right on the upper end of the sink rim.
Step 3
Now position the underside of the sink countertop against the rim of the sink. Now you will have to place the already cut supports on the bowls of the undermount sink.
Step 4
After that, you need to adjust the sink so that it perfectly aligns with the rim and edges of the countertop.
Step 5
Now, place the clips evenly with the use of a screwdriver or adjustable wrench.
Step 6
Once you have positioned a few clips, remove the support to set up the other clips.
Once you finish setting up the clips, your undermount sink installation to wood is complete. Congrats, bud.
How to Install Undermount Sink to Quartz
Installing the undermount sink to quartz is as easy as you will get. The process follows as-
Step 1
You will notice that there are already pre-drilled holes for mounting on the countertop. You will have to tighten the mounting brackets on it.
Step 2
Now, use silicone caulk on the flanges of the sink. It helps the sink to adhere to the countertop.
Step 3
Now from underneath, attach the clips so that the sink snugs correctly with the countertop. Lastly, once again, check the alignment and wipe off any excess caulk with a cloth.
Step 4
Now from underneath, attach the clips so that the sink snugs correctly with the countertop. Lastly, once again, check the alignment and wipe off any excess caulk with a cloth.
Sometimes, you may need to set up the undermount sink in the Granite countertop. Although many people think that there’s a difference between installing an undermount sink in the granite and the quartz, we found them similar.
So, if you really want to understand and learn how to install undermount sink to a granite countertop, you can follow the Quartz installation procedure. The wooden setup is also the same, so you shouldn’t face any issues regarding the Granite setup.
Conclusion
Undermount sinks bring flexibility in the home. So, man homeowners are running after it. Thankfully, the installation of the undermount sink in wood, quartz, or granite is relatively easy.
The DIY project is easy to perform and won’t require any early experience. So, don’t get bog down due to your inexperience. Just follow the above-mentioned detailed steps and see the magic.