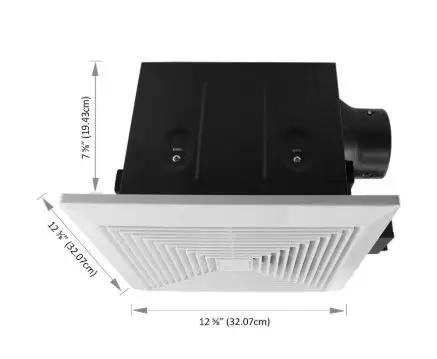
One of the most common problems that we hear from our customers is about the installation process of a bathroom exhaust fan on the first floor. They often ask – how to install a bathroom exhaust fan on the first floor?
Some also ask about the exhaust fan setup in the bathroom without attic access.
So, if you want to learn about the bathroom exhaust fan setup without attic access, stay with us. We are going to reveal the step-by-step guideline for your convenience.
How To Install A New Bathroom Exhaust Fan Without Attic Access
Many people find the use of an attic troublesome and painstaking. Hence, we decided to inform you on how to install a new bathroom exhaust fan without attic access. Don’t get bog down, thinking that the process is stringent. We have simplified it so that you don’t find it tough.
So, shall we begin with the steps to set up a bathroom exhaust fan on the first floor?
Step 1: Check the duct and housing size carefully
Even before you purchase a fan to set up, it’s a good idea to measure the drywall housing for the exhaust fan at home. Then, as you go for purchasing, uncover the fan, and regulate its housing for the drywall.

If you find that the fan comes in a larger size than the drywall housing, you may need to cut the drywall to accommodate the exhaust fan. You may use a keyhole saw to cut the drywall. Furthermore, you may also need wood support for the joists.
You also need to check the duct size of your fan. Mostly, the exhaust fan duct measures 3” or 4”. However, if the duct opening and vent size don’t match, you will require to use a 4” X3” vent-duct adapter. Alternatively, you can enlarge the bathroom vent size from 3” to 4”.
Step 2: Installing the switch
If you want to use the ole switch, there’s no need to install a new switch for your exhaust fan. But most modern-day exhaust fans come with a humidity sensor, and also a heater and light sensor. Hence, to gain control over these sensors, you will require to set up a new switch and connect it to the fan.
Nonetheless, we recommend you to call a professional electrician to wire the new switch since most of us are uncomfortable with electric wires and switches.
Step 3: Adds some extra feature
As you are on the verge of installing one exhaust fan in the first-floor bathroom, it’s time you considered some additional features. You may opt for the humidity sensor.
It lets you set the moisture or humidity level into an optimal level- every time bathroom humidity crosses the limit, the exhaust fan will start functioning to bring down the moisture for comfortable surroundings.
Some exhaust fans also come with extra lights and heating functions. If you have the budget, it’s always better to go for these two add-ones with the exhaust fan.
How To Replace A Bathroom Fan Without Attic Access
Now that we are all set with the fan, it’s time to know how to replace a bathroom exhaust fan without attic access. Thankfully, the process is pretty straightforward.

We have broken the entire replacing process into the following step-by-step guideline.
1. At first, you must switch off the old exhaust fan to avoid any accidents.
2. Secondly, you need to remove the cover of the grill. It is incredibly easy. Pull down the cap, squeeze the metal clips attached with the lid until the clips release the cover. Once released, pull off the grill cover.
3. Before starting to remove the old fan, use a tester to see that there’s no electricity.
4. Now, it’s time to remove the fan motor from the housing. Usually, the main house is connected with the joists using a few screws. So, use a proper screwdriver to remove the screws and then remove the motor from the main housing of the fan.
5. If your fan motor has a plug, you must pull off the plug from the electric source for safety requirements.
6. In case, there’s no plug, then remove the wring through manual procedure.
7. Lastly, you need to remove the fan from the main housing. You may require to remove the mounting screws, brackets, and other hardware. Once you are done with the screws, slowly remove the old fan from the housing.
The rest of the process to install the new fan is easy. Simply, follow the procedures mentioned above in the opposite direction. This means read through the installation manual, then replace the new fan.
Now use a screwdriver to tighten the screw, connect the fan with the electric source using a plug. Lastly, mount the cover and turn on the switch.
That’s it- you have successfully replaced an exhaust fan without attic access.
Conclusion
Installing the exhaust fan on your first floor is straightforward. There’s no need to make a hotchpotch of it. Just do one thing.
Follow our in-depth step-by-step guideline on how to install a bathroom exhaust fan on the first floor, and you will find it as easy as anything else. Once you set up the fan in the bathroom, don’t forget to thank us. It inspires us.
-
Pingback: How to Vent A Bathroom Fan Through Soffit
-
Pingback: How to Fix A Bathroom Floor That Is Rotting
-
Pingback: How To Install Baseboard Molding On An Uneven Floor


