Gardening is thrilling and fun, especially when you see the flowers blooming and veggies growing in your favorite garden. However, all your fun and thrill may get ruined when you begin watering the garden. It becomes worse if you have to carry the water in a bucket from your indoor home faucet.
Thus, connecting the garden hose with the outdoor faucet is the most convenient and practical idea to ease out the watering process. But do you know how to connect a garden hose to the outdoor faucets?
Well, it is a straightforward process when you know the basics.
Firstly, you have to attach the garden hose with an adapter. Then, you must re-connect the hose tip once you have used the hose for watering before storing it back. It helps the hose to remain in good condition for a longer time.
How to Connect Garden Hose to Outdoor Faucet
The outdoor faucet in your home is a great way to enhance your gardening experience. It saves you from carrying the heavyweight water-filled bucket right from the kitchen sink or bathroom to your garden. Also, attaching and detaching the garden hose with your outdoor water valve is quite easy.
So, why shouldn’t you take benefit of it?
Part 1: Attach the Garden Hose with the Faucet
When you get the garden hose, you will also get an adapter within the hose package. It needs to be connected to the end of the outdoor faucet for a secure and leak-free watering experience. You will need a screwdriver to perform the attaching task quickly and safely.
Step 1: Get the adapter
Firstly, you must equip with the right faucet adapter for your hose connection. An adapter is a small tool often made of brass. It connects with the watering valve and quickly converts it into a male garden hose fitting.
Thus, you can connect the female end of the garden hose with it.
An Important note:
The faucet adapter must be rust and corrosion-proof for a safe watering experience. Also, it prolongs the adapter lifespan. You may opt for the brass-made and zinc plated faucet and valve adapter for such a rust resistance feature.
Step 2: Remove the adapter screws
You will require a screwdriver to remove the screws from the tip of the faucet adapter. You should place a piece of cloth underneath the adapter before you remove the screws. It will assist you in storing the screws securely, as these are strictly small and may get lost.
Also, if you work over a sink, placing the towel prevents the screws from going into the drain through the sinkholes.
Step 3: Connect the faucet adapter
Now, carefully connect the faucet adapter with the outdoor valve. Turn the adapter until it has a good seal with the valve. Also, you don’t need to use any power tools for the purpose. You can fix the connection with your hands.
Furthermore, use a vacuum breaker to establish a secure connection. The vacuum breaker comes in integrated with the plumbing system. If it is not integrated with the outdoor faucet, you have to buy the vacuum breaker separately. Then, attach it with the faucet adapter.
The vacuum breaker safeguards the drinking water from chemical contamination.
Step 4: Ensuring the leakage-free connection
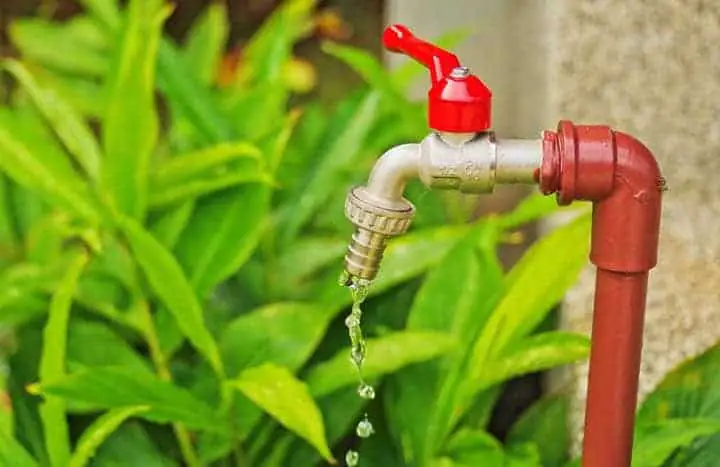
Most garden hoses come with rubber or vinyl gasket. It ensures a leak-free connection. It enables you to use the water in the garden the best way and prevent its wastage. Before you connect the garden hose with the outdoor faucet adapter, check that the gasket is in its right position.
Unless the gasket is placed rightly, water will dip from the connection. Hence, you will feel sogginess in your hand while watering.
Finally, screw the garden hose with the converted male adapter of the outdoor faucet.
Part 2: Attach the Outdoor Faucet Tip Again
Although the gasket works fine to establish a leak-free connection between the outdoor faucet and garden hose, it is not 100% promising. Thus, you have to re-attach the outdoor valve tip to make the seal more durable and 100% leak-free.
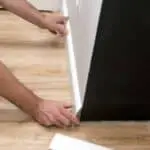
Step 1: Replacing the tip
Once you have used the garden hose to fulfill your watering needs, you should remove the hose. Also, don’t forget to detach the valve adapter.
After that, connect the tip of the faucet with it. Use the screws to secure the connection. Ensure the screwing is tight so that it forms a secure sealing. The replacement faucet tip should be in good condition. Otherwise, it will still run the risk of leakage and water wastage.
Step 2: Use Teflon tapes for enhanced safety
Teflon tapes are used widely to form a secure and leak-free connection. If you want to further enhance the security of the leak-proof connection, using the Teflon tapes underneath the faucet tip will be a good solution.
For this, find the threaded part on your outdoor water faucet. Then, wrap it with the Teflon tapes couple of times. Trim off any excess part of the tape before you replace the faucet tip.
You should turn the tape in the clockwise direction for the secure connection. Also, you shouldn’t use the Teflon tapes for more than two to three turns. Or, the threaded part of the faucet will be too heavy and unable to accommodate the valve tip.
The Faucet and Tap Variants Around the World
You should know that both the word taps and faucet refers to the same plumbing system. However, the two names are used in different regions.
The word faucet is used widely in the US and Canada whereas, people in the UK will use tap to refer to the same plumbing system. But it has some other variants to refer to different uses too. It includes-
- In the UK and Ireland, tap mostly refers to indoor water fittings. It is used to supply water in kitchen sinks, washing basins, and bathrooms. The outdoor faucet is known as the outside or garden tap.
- In the UK, people also refer to the tap as the spigot, valve, or hose bib or even simply the bib.
- In the US, people mean a beer tap by the word tap only.
What Is the Standard Garden Hose Size?
The standard garden hose size in the US is ¾” or 5/8”. It refers to the inner diameter of the garden hose. Also, you will see the 3/8” garden hoses in use. You should note that the ¾” hose with its bigger diameter is used mainly for professional purposes.
It is because enhanced inner diameter results in the least drop of the pressure inside the hose from the outdoor faucet to the watering point. Also, it enables a higher water flow rate to cover a massive space in a relatively quick time.
The 5/8” hose is more suitable for use at homes and medium-sized gardens. Also, you can use the calipers scale or measuring ruler to measure the hose diameter.
Conclusion
Connecting a garden hose with the outdoor faucet isn’t challenging. The main challenge comes with securing the leak-free attachment of the two plumbing tools. In this guideline on how to connect a garden hose to an outdoor faucet, we have ensured the leak-free connection promptly.
The use of the Teflon tape and faucet tip should ensure the least leakage and, therefore, the least water wastage. Also, for gardens, you should choose the 3/8” or 5/8” hose. It will yield the best watering experience for you. A larger hose is expensive and needs maintenance too.