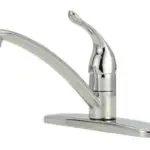
Most modern-day faucet manufacturers these days are making baffling variants of bathroom and kitchen faucets. Grohe and Moen are leading the path in this respect. Consequently, removing or replacing the valve and cartridge of these two brands may seem a bit complex to most people.
That’s the reason we have piled up all necessary requirements to remove, replace, or set up a new faucet and cartridge in this article. This is going to be extremely beneficial for you. So, let’s begin.
How to Take Apart a Grohe Bathroom Faucet
Grohe bathroom faucet, likewise any other regular valves, has screws on the handle and a faucet connection. But the set of screws are often hidden cleverly underneath the lever or camouflaged behind the cap. To take apart the Grohe bathroom faucet, you need to remove the handle first.
Luckily, the handle removal process is quite easy. You can pull off the handle with your hands with careful flipping of the handle. But, if you find any screws, use a screwdriver to remove them. Then apply adequate pressure to remove the handle.
Lastly, wipe out the screws from the faucet to remove it from the basin. Isn’t it easy? What do you think?
If you, however, find identifying the screws or unsure if you can remove the faucet with hand flips or not, you may contact a professional plumber.
How To Replace A Grohe Cartridge
If you want to replace a Grohe cartridge, you will need the following things.
- Hex key 3/32″
- Adjustable wrench
- Replacement cartridge
You can get these things in your nearby plumbing shops, and these won’t cost much also. So, you are up to read an intriguing Grohe cartridge replacement step.
Turning Off the Water Source
Find the water source beneath the shelving unit or valve and turn off it. The turn-off switch is easily identifiable since this made using a rugged copper pipping and one or two knobs. Flip the knob to reach the shut-down state.
Loosening the Handle
Please turn on the hex key and allow it to rotate counterclockwise for at least four to six times near the faucet handle. It will automatically loosen the grip and spigot for easy removal.
Removing the Handle
Once you have untightened the handle and spigot, slowly remove them from the valve assembly. It will reveal the cartridge in front of you.
Remove and Replace the Cartridge
Now, use the wrench to remove the old cartridge. It would help if you turned the wrench counterclockwise to remove the cartridge.
Once you remove the old one, refill the cartridge holder with a new one. Then, tighten it using the wrench in the clockwise direction.
Replacing the Handle and Spigot
Now, replace the spigot and handle using the hex key. Once you are satisfied that these are fastened enough, turn on the primary water source.
How To Install A Grohe Bathroom Faucet
If you are new to installing the Grohe bathroom faucet might be a daunting task for you. However, the following guideline should come in handy for you.
- At first, insert the tubes with the basin mixer hole.
- The watertight seal of the mixer should be connected with the basin. Now, firmly attach the mixer with the seal.
- Lastly, take a tightening nut and insert it into the threaded rod. While you do so, position the seal towards the nut.
- After that, use a screwdriver or a wrench to tighten the lock with the rod.
After this, you need to perform the setup of the plug-hole separately. To do it follow these steps-
- Seal the plug-hole with a watertight component and insert the plug-hole into the drain hole.
- Screw the threaded part of the plug-hole with the basin.
- Now, carefully enter the pop-up rod into the basin mixer.
- Use a connector to join the horizontal rod with the pop-up rod.
- Ensure that the plugged hose is connected tightly. You may use a 10mm spanner and wrench for the perfect tightening.
- Using a metal saw, remove the extended part of the plug-hole and locking rod.
- Before you stop, make sure the seal of the plug-hose is right. Otherwise, use another watertight seal to fasten the seal of the plug-hose.
That’s it, and you have successfully installed a Grohe bathroom faucet.
How Do You Take Apart A Moen Kitchen Faucet
Taking apart a Moen kitchen faucet is straightforward. You will need-
- Screwdriver
- Adjustable wrench
- Needle-nose pliers
The steps are –
- Turn off the main water source.
- Remove the external housing of the valve using a screwdriver. Be careful not to damage the casing.
- Now also remove the screws holding the valve handle to remove it.
- Using a wrench pull off the nut to take apart the spout from its position.
- Now you need to remove the clip holders. Use a needle-nose plier to remove the retaining clips and then take the cartridge off.
Final words
Removing or replacing a kitchen and bathroom faucet, refilling the cartridge- all these are made easy in this detailed guideline. So, the next time you find difficulty in performing any of these jobs, turn to this step-by-step guide.
Your stress will go away instantly.
-
Pingback: How to Remove A Stripped Screw from A Shower Faucet
-
Pingback: How to Make A Faucet Handle Turn the Other Direction
-
Pingback: Can A Kitchen Faucet Be Used for A Bathtub?
-
Pingback: How to Fix A Bathroom Floor That Is Rotting


